Planting in a Pot Without Drainage Holes
I always recommend planting in a container with drainage holes but many times there are pots without that we want to use - we’re focusing on indoor pots rather than outdoors today. It’s common for many wall planters to not have drainage as free-flowing water would damage interiors and many aren’t designed with reservoirs. Additionally, some of us also like to plant in baskets, pottery, and unconventional items that may not be designed for plants.
Here’s how I deal with planting in pots without drainage holes.
Using Them as Cachepots
If you’re a beginner and lack confidence in watering, I first highly recommend trying to find a plastic pot you can fit inside your no-drainage container, thereby using it as a cachepot - that’s often how they’re designed to be. If the container is completely sealed and waterproof (like glazed ceramic), you won’t need a saucer. But if your container isn’t water-tight, then you’ll need a saucer to protect from leakage. Some example of my most common un-sealed pots are:

Example of placing a plastic pot in a basket
Baskets
These definitely need saucers! Occasionally you’ll find baskets meant for planting in that will be lined in plastic, to which you can skip the saucer. But generally, baskets need that extra protection.
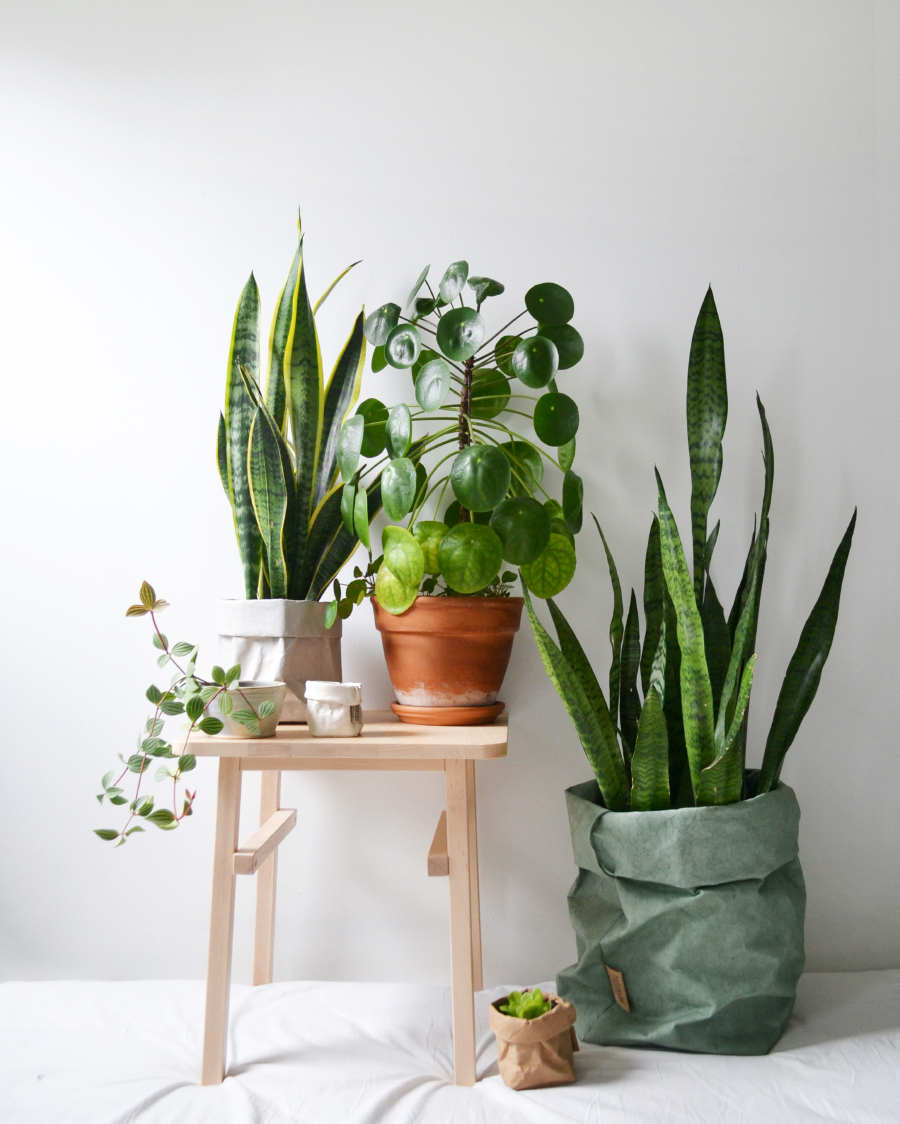
Uashmama paper bags
Fabric
Again, saucers needed! Most fabric pots are not waterproof, so use them as coverings for unsightly pots. These are meant to be decorative and should not be planted directly into. For pots you can actually plant into, continue reading.
Planting Directly in Them
Here you’ve got your waterproof containers. I get it, sometimes you want to plant directly in these hole-free pots because it may be hard to source perfectly-sized plastic pots or you simply want the soil surface to look tidy. I consider this intermediate plant care and not for beginners. Here are my considerations for direct planting:

Shane Powers Ceramic Wall Planter, Ikea Asker Pot (both discontinued)
Modernica Case Study Ceramics® Table Top Arroyo
❶ Good Light
If you’re going to foray into direct planting, no-drainage containers work best when given proper bright light. Most failure comes from placing these pots in shady spots, to which the soil isn’t able to dry out properly causing root rot. I’m always aware of giving my no-drainage plants optimal bright light, rather than “good enough” light. Allot your most challenging pots in the best spots, and put the reliable “tried and true” pots (like terracotta) in the shadier areas.
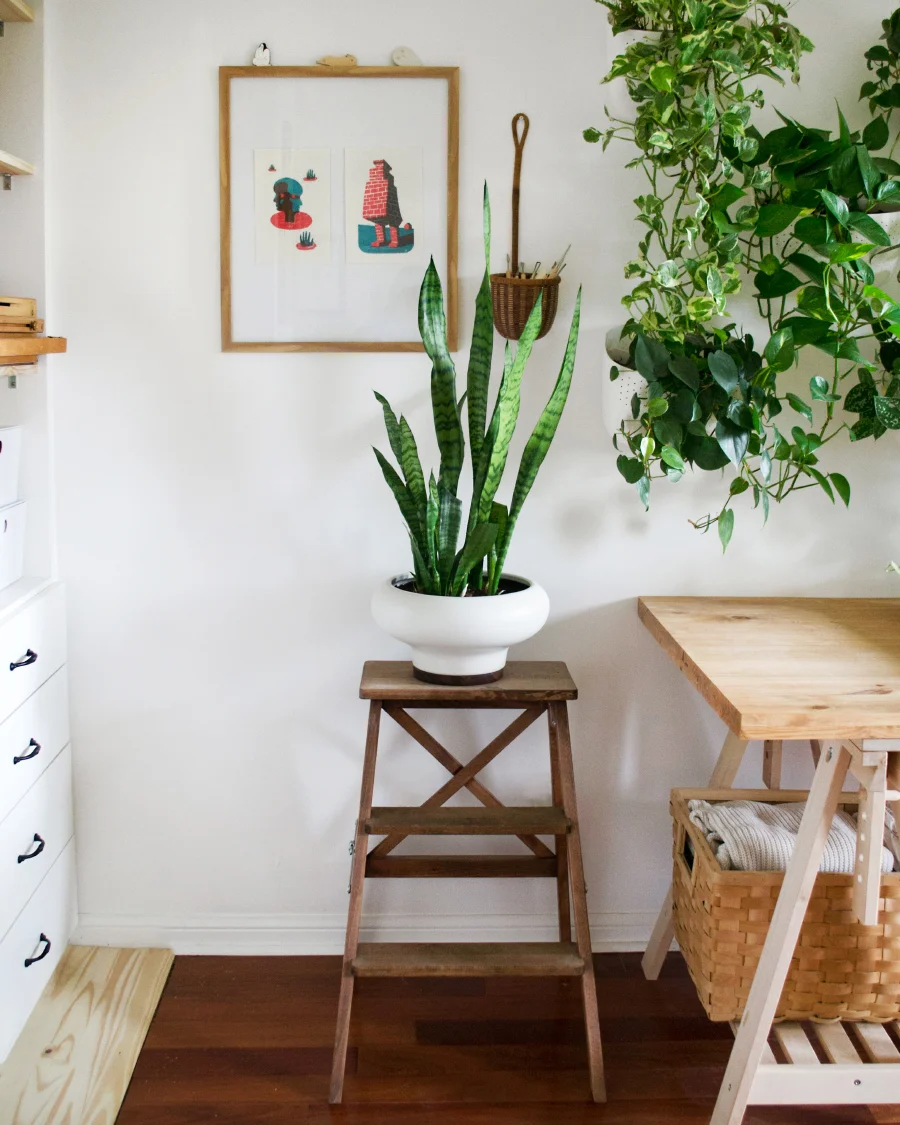
❷ Appropriate Plants
Pick plants that are able to handle fluctuating wet and dry conditions as assessing soil moisture is the toughest part of direct planting. Pothos, Philodendron cordatum (‘Heartleaf’) and Chlorophytum (‘Spider Plants’) are my go-to recommendations if you’re starting out. Pictured above is a Sansevieria, which is a little trickier in no-drainage, but possible with all the considerations in this post. Start with the former types of plants before moving onto a plant like this.
❸ Well-Draining Medium
For direct planting, you don’t want to cheap out with potting mixes that are heavy in peat and therefore stay wet longer. Instead, choose a well-draining mix. I like Pro-mix, and will often amend with extra vermiculite.
❹ Appropriate Pot Size
Make sure your roots are fairly snug in a no-drainage pot as excess soil means longer dry-out time because the plant isn’t intaking the water fast enough.
❺ Watering Technique
You can use a skewer to assess wetness before watering. When watering, don’t just water in one place - move your spout around the area to evenly saturate the soil. Err on the side of less than more, focusing by the roots.
Common Questions
Creating a Drainage Layer?
Many people like to add pebbles and activated charcoal at the bottom 1-2 inches to create a drainage layer for excess water to escape into. By all means try this, but I personally don’t bother as I like to fill the pot with as much growing medium for future plant growth. Like I mentioned, light is king. Having proper light ensures proper drying, which means I can skip out on this layer.
Can I still shower these pots?
If you read my Shower Your Plants post you know I like to advocate showering your plants every so often. For pots without drainage, I don’t recommend placing them directly under the shower because of course, it would flood! But I still recommend cleaning the leaves, so what I do is tilt the pot sideways, hold the soil down with my hands and rinse foliage under the nozzle (think: washing your hair in a sink without actually getting the rest of your body wet).
Do I Fertilizing as Normal?
Like I mentioned in my Fertilizing Routine post, I recommend ideally using organic fertilizers with pots without drainage (like Espoma or MARPHYL), but if you do use synthetic (like Schultz), use it at atleast half strength. No-drainage means salts in the soil aren’t able to leech out, so the possibility of chemical burn over time is very real.
If planting without drainage is new to you, don’t practice on your favorite plants. Build confidence, and environmental awareness (that wonderful light/temperature/humidity/etc. that affects plants and soil) first and soon you’ll be able to plant in anything you’d like! Seen pictures of succulents in old boots? Sure, that’s possible! But it’s often done by an experienced grower, which you can certainly be. Start simple (a cool cement planter from a Queen W. shop maybe) and go from there.
Support my Work by Purchasing an Art Print!


Related Posts:


Spa day for your plants: the benefits of giving your houseplants a shower.