How to Create a Living Plant Wall

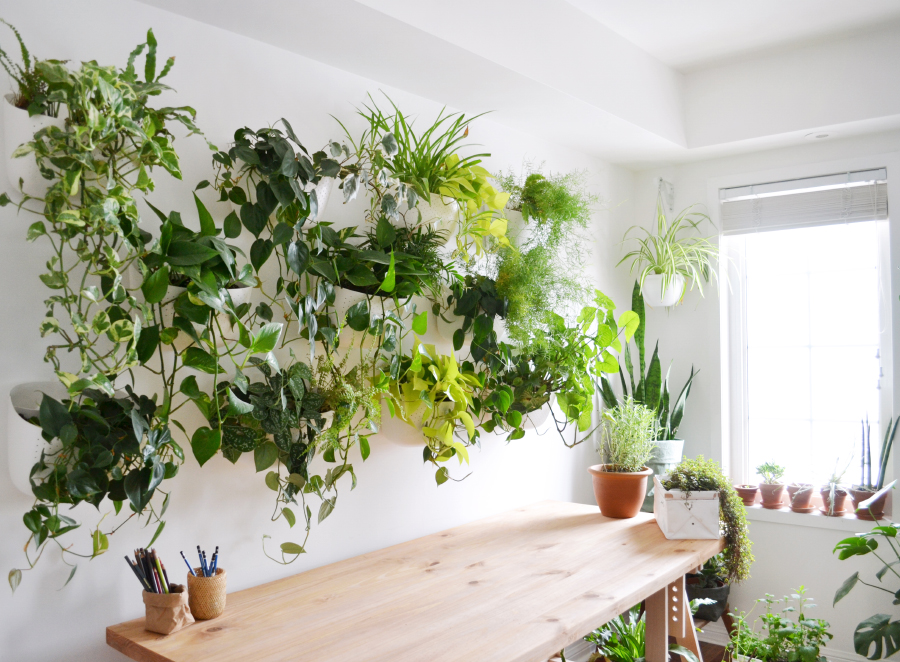
Finished living plant wall! Planted with various vining species
It’s been on my plant checklist to have a Living Plant Wall so I’m delighted to finally put one through the ringer! This is installed in my home studio above one of my work desk: a welcome scenery to once was a blank canvas of a wall. For this project, we're using the WallyGro Eco planters in White.
Disclaimer: this is not a sponsored post though these products were provided by the company - (10% code: "studioplants") (no longer available)
Unboxing
Delivery was quick to Canada and because the planters are sturdy, there were no issues with damage. These planters are incredibly lightweight.

Ready to be unpacked!
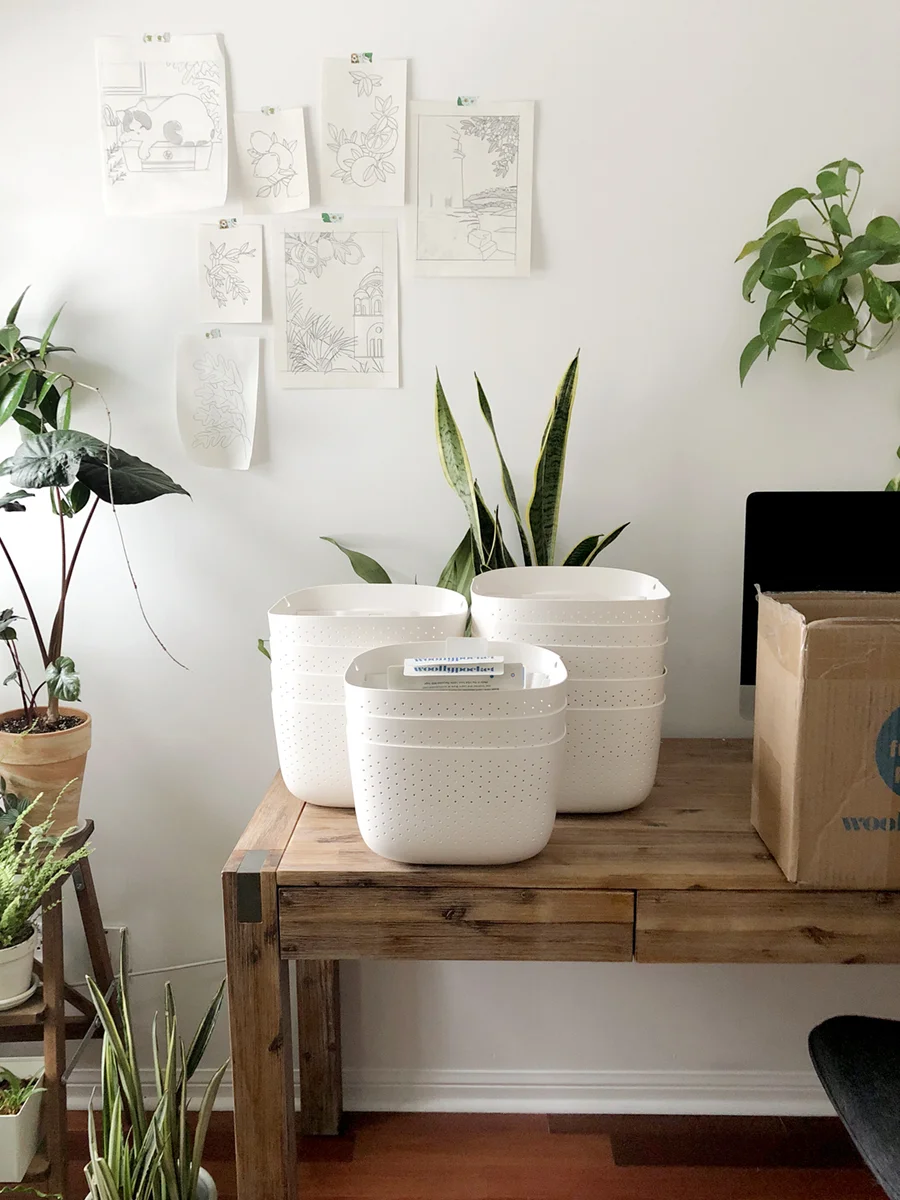
Inside are the planters, stacked, with some instructional cards inserted

Made from 100% recycled milk jugs
The Preparation
See the install Instagram stories here.
Specs (from their site):
Size: 8” H x 11.75” W x 8” D
Soil Volume: 0.25 cu.ft
Suggested plant volume: 1-2 4” diameter plants
Material: 100% recycled milk jugs (HDPE) BPA Free
Pantone: TRUE WHITE
Suggested Paint Swatch: BEHR Palais White
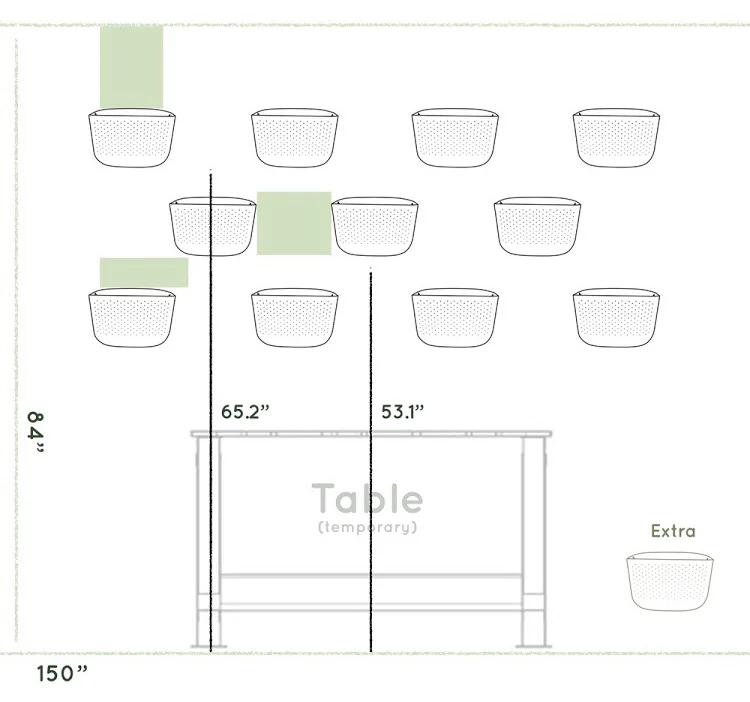
For this projects, I laid my planters out in Photoshop: I had 12 and used all but 1. Out of all the grid formations, I liked this row spacing for its airiness. Alternatively, according to Wallygro, they suggest: "For a flush living wall, we suggest hanging the Wally Eco on a 12" W x 10" H point-to-point grid; this is the tightest measurement you can achieve with our hard shell planter. For more mature plants and/or more spacing, scale this grid accordingly."
The Install
Installation is as quick and as straight forward as mounting any other wall planter. They provide you with all the hardware but we chose to add additional security by using heavier duty dry wall anchors as well: just in case.

❶ Marking the grid
Afterwards, Waldek taps nails in to create holes so that it's easier to drill into later. Don't skip out on using a leveller!

❷ Drill
You can definitely do this by hand with a screwdriver if you'd like. Here we're installing the wall brackets.

❸ Double-Check
It's never fun to double-check your homework but for a large fixture in the home, it's a must! I highly, highly recommend using a leveler.

View of the back: where the planter will "hitch" onto the wall brackets

❹ Mount Planters
They simply snap into place. We like to wiggle them side to side to ensure that it's well mounted.

Off to the races! We bought a variety of tropical plants for the wall with a light mix of tones and variegation.
Placing The Plants
Even though I have south-facing windows, because the light source is adjacent, part of the plants will be obstructed by neighbouring plants. So, I picked low-light plants that I already had experience with (when in doubt: pothos). Get yourself a light meter if you’re not confident with assessing brightness.

The Finished Install
Ready for plants! We chose white so that the planters would recede into the wall, making the plants the focal point rather than the containers.

Playing Around
Still in their nursery pots, I popped plants in and out until I liked a formation. Wallygro recommends 1-2 4" potted plants: I went a tad larger for some (6"), but only planted a single plant.
The Reveal
Specs:
Location: home office
Light source: adjacent south-facing windows
Area: 72”x32”
Quantity: 11 planters
Plants I used:
Pothos, philodendron scandens, asparagus densiflorous, tradescantia, and various ferns


Watering
Because these are indoors, I didn’t drill drainage holes. I water each planter manually with a watering can, filling up the reservoir. There are tiny holes at the front that help with drying out the soil and with air-pruning the roots. Yes, these can leak! But only if you water incorrectly which is top watering instead of the the back.
There is a misconception that the back water tank is a reservoir that holds water. Actually, it’s only meant to redirect it! So when you fill it, you don't actually fill it until the back tank stays full (it never will). Instead, filling this tank just redirects water to the bottom of the planter (bypassing the front holes that can leak) into the actual reservoir. This bottom reservoir allows the plant to absorb water from the bottom-up.
The volume of water you pour into it depends on how dry your soil is. I water modestly, let the soil absorb, touch the soil, then water again if the drop 2 inches are still dry.
Update: 3 Months
It’s been exactly 3 months since the WallyGro install: here are how the plants are fairing.
This wall is adjacent to a south-facing window

Over time, the plants will start growing towards the light source and lean towards the window
Observations
❶ No more ferns:
Boston Ferns begone! Yes, even I couldn’t handle the extra care of these ferns. I realized with such a large area of greenery, low maintenance is really the name of the game. I wanted to water everything as little as possible and didn’t want to run a humidifier 24/7 due to energy usage. So in the end, I pulled most of the ferns and replaced them with my reliable philodendron vines and pothos.
❷ Importance of top-watering:
With this being a bottom-up watering system, one thing I should have done is top-watered the plants in really well to settle in the roots. I found during my planting, my soil didn't get compacted properly and because of this parts of the planter didn't wick up water at all due to air pockets.
Learn from me! After planting, bring these plants into your shower and give it a thorough drenching. It’s extra work, but it’s worth it. As always, let them dry out slightly before placing in any shaded area to prevent water logging.
❸ “Why IT IS SO scraggly?”:
The leaves will always face towards the light so gaps are inevitable if your window is adjacent like mine. I’m working on fixing this with regular pruning, so my vines are short for the time being. If you’re an “instant gratification” person, place your planters a lot closer to each other. I was trying to be economical and space them out, but the trade-off is you’ll need patience for the growing plants.
❹ General watering:
I actually ended up under-watering rather than over-watering. Knowing there’s a reservoir (which encourages forgetfulness) combined with the front-facing air holes means the soil dries out faster than you think.
Final Thoughts
This system is a great one to use if you aren't up for the task of figuring out the logistics of a custom Living Wall, but are instead comfortable with the maintenance of watering pots like any of the others in your home. WallyGro does offer an irrigation system to set up if you ever wish to do so in the future. For me, hand-watering is perfectly fine at this scale and I'll continue to do so.
My main goal when installing this wall was that it be an overall realistic project and that means starting small. As much as floor-to-ceiling greenery looks and sounds amazing, for most homes, we can’t sacrifice the utility of an entire wall. This wall for example, will have a work desk under the planters because it is after all, a studio. If I want to expand the wall in the future however, it’s just a matter of installing more planters. Start small, feel out the maintenance, then scale up. Let the wall grow with you.
Support my Work by Purchasing an Art Print!


Related Posts:


Using the WallyGro system for an easy-install plant wall. And, the updates months later.