Small Kitchen Renovation on a Budget Part 1: The Backsplash
We have a small, but hardworking kitchen. It’s essentially the heart of our home: Waldek loves to cook, make cocktails and generally nurture ourselves and our friends through this space. He also happens to have his desk right beside it (we have an approx. 500 sq ft open-concept first floor that combines kitchen, office nook, and living room). When we moved into our place, we knew it eventually needed to change to better suit us, so here we were: 1 year after finally doing it.
Our Goals:
Reuse as much of the old: we wanted to keep as many parts and fixtures of the original kitchen as possible. This was important for us to minimize waste and keep it budget friendly. Our kitchen was getting a new face, but the guts would be the same.
Lighten up the space
Visually enlarge the space
Bring warmth and cozyiness to the space
Our Renovation Background:
None. Nada. We are D.I.Y Google-everything-and-hope-that-theres-a-Youtube-video-about-it kind of people. We aren't builders, architects or interior designers in any sense of the word. The only leg-up we may have is that we know how to Photoshop and Waldek is proficient with basic tools. And that's kind of the great thing; if we're able to tackle our kitchen virtually by ourselves, it's possible for other everyday folk too.
The Old Kitchen
This was our kitchen initially. We didn’t change the layout at all, because it was actually great. The “U” counters swung into the space to divide the kitchen and office nook. Our appliances, although aging, functioned fine and didn’t need an upgrade. The exception was the microwave, which died and was upgraded to a white, low-profile model.
The previous owners installed a pretty dreadful mirrored backsplash, which in theory was supposed to enlarge the space but in practice, just reflected counter clutter and made it actually feel smaller. It was also a nightmare to clean.
Here's what we kept from the old kitchen:
Fridge, oven, dishwasher
Half the cabinets
Granite countertop
Faucet

Whirlpool Over the Range Microwave (Model #YWML55011HW)

The mirrored backsplash that needed to go

Freshly ordered in tiles
Removing the mirrored backsplash was thankfully an easy process; it was just a little by dangerous and needed to be boxed up and disposed of properly. Already the kitchen was starting to have a breath of fresh air.

Floating Shelves
The focal point to our kitchen would be two long floating shelves! Their purpose would be to open up the space. Aesthetically, we could enjoy displaying some kitchenware but just as importantly was its functional: it would allow us to grab and go seamlessly without having to open cabinet doors. It would help with workflow.
So, Waldek tore out the cabinets on the Western wall. He ended up installing several L-brackets because we couldn’t find “proper” floating brackets for the depth of shelf we wanted. If you have a shelf with different dimensions than ours, you may have much more luck finding hardware online. We would have preferred to go this route, but alas, we worked with what we could find.

L-brackets were carved into the drywall and nailed into studs where available

The area was then patched up and sanded
The Tile
We chose a simple white tile from a local shop: Pollock's Carpet Market in Roncesvalles, Toronto. These tiles were made in Italy by manufacturer Marazzi. We loved these because of the matte texture would help disguise kitchen grime (less cleaning time is always A+ in my books) and bring in more earthiness than a slick gloss finish. The uneven, hand-made textural quality sealed the deal.

Marazzi, BRICCO Series, BIANCO, (2.76" x 11.02")

Waldek's uncle had a ceramic tile cutter that we borrowed, but these are easy to rent out from a local hardware shop
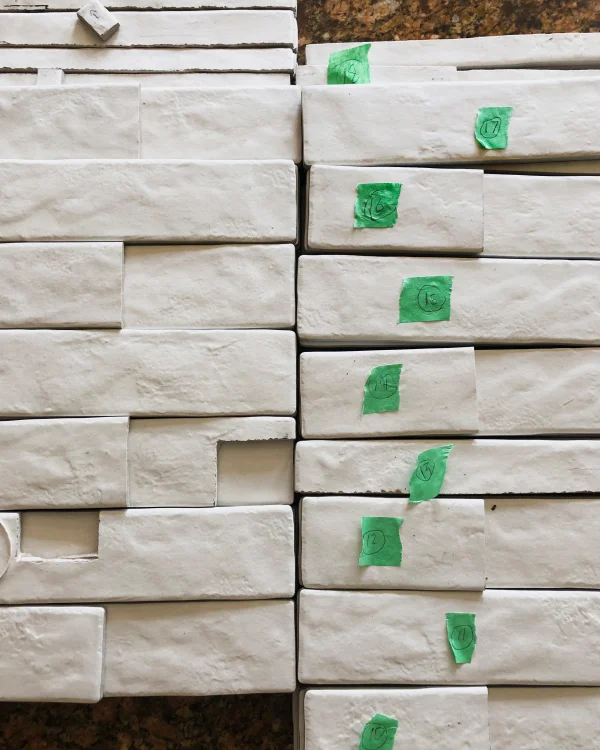
Tiles pre-cut and ready for placement
The Install
We went with a classic tile pattern, which is just the offset (running bond). The first step of course, was laying down the grout. After the initial few passes its easy to really pick up a technique. For spacing, we used 1/8-inch spacers.

We use 1/8-inch tile spacers

The first layer: mortar

Waldek meticulously cut the tiles around the sockets
Before the grout could harden, we quickly worked on laying down the tile, working section-by-section from the bottom-up. This is where having two pairs of hands come in handy! I would grout while Waldek placed the tile and spacers.

We lived life on the edge and forgot to cover the sockets during the entire install

First wall complete!
The biggest hurdle was cutting the tiles thinly to accommodate for the L-brackets on this Western wall. We broke quite a few tiles attempting it, so always order more than you need! You won't regret it.

We whipped up some custom spacers with wire we had lying around

3/4 view of partially hidden bracket

Two neat rows almost ready for shelving
The result of all that meticulous work were brackets that were smoothly hidden behind the tile. They would then slide into a hollowed-out wooden shelf and cover the last sliver of visible mortar. You can have L-brackets over your tiling to show visible supports for your selves, which is a look, but we love that the hardware was completely hidden.

Overall, we spent about a day laying out each tile.
Next … we grout! We went with a bright white as we didn’t want the outline of the tile to stand out. The backsplash is supposed to serve as a quiet backdrop to the entire kitchen: something that complimented the white walls in the rest of the space but was textural enough to denote it as a separate space. We also had a busy accent wall right beside it so we didn't want two neighbouring patterns competing.

Bright white grout

Waldek did the small vertical nooks first

Finished (left) vs. Unfinished (right)
To see how the backsplash turned out and the painting of the cabinets, see: Part 2.
Support my Work by Purchasing an Art Print!


Related Posts:


A cozy cottage-inspired kitchen with a modern update that’s themed in wood, greenery and steel.